by
Scott Moore
![]()

|
I made these plans after looking all over the world wide internet. I took a little
bit from each of the plans that I liked and came up with this design. Everything
with the exception of the top plywood is standard 2x4 and 2x6 pine. At the time
that I made this, I had a limited amount of tools. Here is the tools that I used:
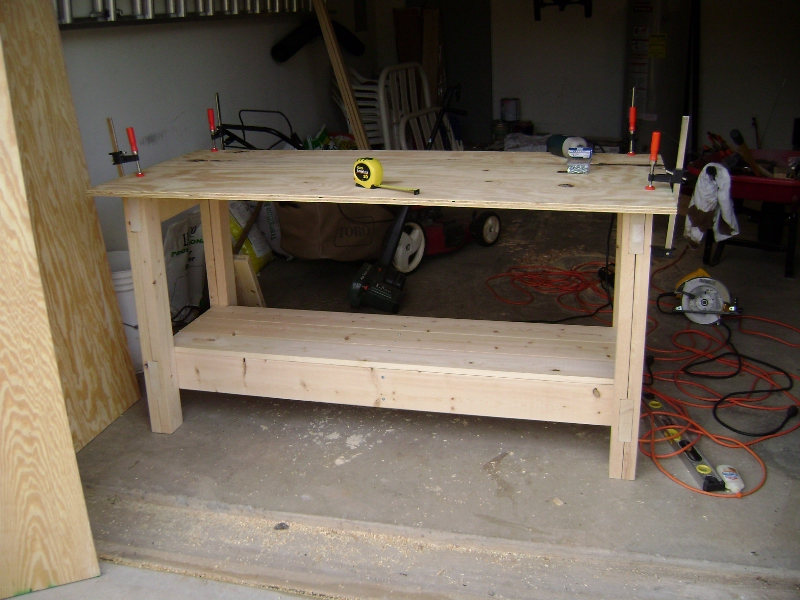
The bench, not including the top, is 32 inches high, 24 inches deep, and 5 feet wide.
Feel free to email me with questions at: smoore at scottmoore.net. |

|
I started on the legs. I cut 8 2x4s to a length of 32 inches. I then used a circular saw to create the dados for the 2x6s. This was the only tool I had at the time. I cut a dado 5 1/2 inches in width. On the bottom part of the legs I cut it 6 inches from the bottom, and then the top 5 1/2 inches. Since a circular saw was the only tool I had to do this, I did many cuts and used a chisel to remove the waste. I used a belt sander and orbital sander to smooth the dados. |

|
I've never used chissels before, and quickly learned that you probably need to use gloves. My wife was not too happy, and I continued the project after a week of healing. |

|
Each side of the bench will have 4 2x4s cut like this, and 2 2x6s. I cut the 2x6s to a length of 24 inches and on the bottom 2x6, I cut 1 1/2 inch dados using the same method as above. They will need to be 3 1/2 inches in on either side. |

|
Assembling each pair of legs using woodglue and clamps. |
| I assembled each side of the workbench using wood glue and clamps. I drilled 2 holes in each joint using a half inch drill bit. Then gently hammered through a 1/2 inch wooden dowel in each hole, cut off the remainder, and sanded down the excess to be flush with the leg surface. |

|
| Once each side was dry and solid, I began to assemble the table. I used 2-5' 2x6s to attach in the dados on the lower portion of each side. You of course can make your bench as wide as you want. I have limited space in my garage. I used 2 inch wood screwed to secure them in place. |

|
| The fully assembled legs. |

|
| Top close up of the legs. |

|
| Close up of the 2x6 and the lower portion of the legs. |

|

|
For the lower shelf, I simply added 3 1x6s and supported them in the middle with a scrap peice of 2x6 cut to size. I didn't measure these, but rather placed them on the shelf and marked them where I needed to cut them evenly. |
|
For my top I wanted a nice, solid workspace. I bought 2 sheets of 3/4" pine plywood, and one sheet of oak plywood that would be the top. I don't remember the exact measurements I used for the top but I simply measured the distance between my legs and added 4 inches to the width. The depth would be an additional 2 inches from the back, only allowing 2 inches of overhang on the front, and flush with the back. I screwed the bottom piece onto the bench place using 1 1/4 inch screws. |

|
With the other 2 pieces of plywood, I clamped them together, making sure all sides were flush, and used 1 1/4" screws to secure the plywood together. Upside down of course because I want the oak as my top. I used 1 1/4" screws so that they would not go through all 1 1/2" of wood. I did not want any screws showing on my workspace. |

|
I then turned the 2 pieces of joined plywood over, and clamped them down to the already attached plywood on the bench. Using 1 1/4" screws again I screwed up from the bottom of the workbench to join all 3 pieces of plywood. This sucker sure will be heavy. |
| The rails or sides of my table top, are 1x3" pine pieces. I suggest using a mitre saw for cutting the 45 degree angles at the corners. I resorted to 45 degree angled cuts using a circular saw. |

|
| I attached the edges using finishing nails. Note to self, add a finishing nail gun to my Amazon wishlist. |

|
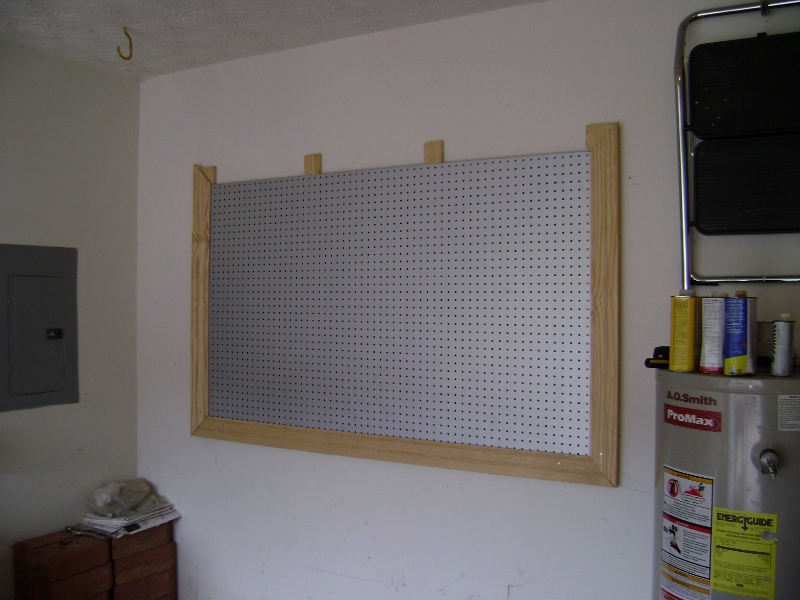
| I needed a nice pegboard for all of my tools, and I wanted this mounted to the wall, rather than the back of the workbench. I found this pre routed wall material at Home Depot. It has a nice route for attaching the planks together when you use them to on a wall. I found that this little routed notch would be great for framing in my pegboard. I raised them a little off of the wall with more 1x3" pine so that the pegboard wouldn't be flush against the wall. |

|
| In the picture above, you'll notice that I just put up one side and the bottom framework for the pegboard. I did this so I could exactly measure the other side. I was right, the pegboard slid down in the routed notches like an envelope. I was very proud of myself. I finished it off with a final piece on the top. |
|
| Here's the final bench with the pegboard. |

|
| And here it is with my tools. Note: The hot water heater is not installed, I plan on moving it upstairs to replace the existing hot water heater. No, I am not storing chemicals or blowing sawdust all around an installed hot water heater. Thanks for those that were concerned. |

|
| Here is a second workbench that I built my father for Christmas. I put a few coats of stain on it, and like the resulting finish. The oak top has an additional few coats of polyurethane for added protection. I must say it looks a little bit better than his old method of cinder blocks and doors. |

|