by
Scott Moore
![]()
|
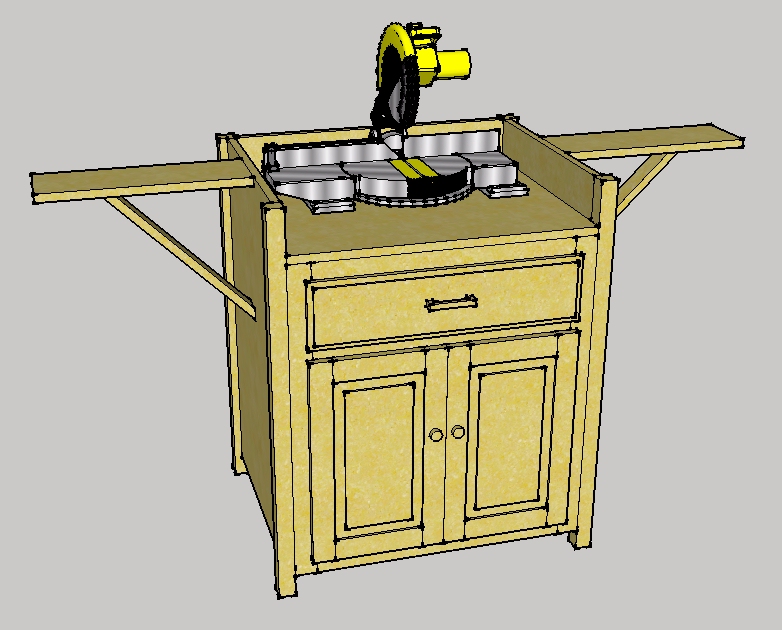
Time for a new project. I really need a mitre saw stand because mine is taking up
too much room on my workbench. I designed this similar to my router table and will
make it from birch as well to match.
Here are the tools that I used:
The table, not including the top, is 36 inches high, 24 inches deep, and 30 inches wide. I will leave myself 4 inches from the top for the mitre saw to sit in with some wings on each side to hold up larger lumber. Click on image for full size. Feel free to email me with questions at: smoore at scottmoore.net. |

|
The cabinet for my mitre saw table will be very similar to my router table cabinet. Once again I used 36" 2x2 poplar for the legs, and my trusty Kreg pocket hole jig to hold it together. |

|
A close up view of the legs with pocket holes. The braces are flush with the inside of the cabinet. This way I can put some birch plywood for the outside edges, similar to my router table. |

|
The assembled legs of the cabinet and a perfectly placed Bud Light can. |
| A set of perfect pocket holes. |

|
| Assembling the cabinet on my old kitchen table/assembly table. |

|
| Here is the frame of the cabinet fully assembled. The front side facing the camera will have one wide drawer on the top, and 2 cabinet doors on the bottom. The Lesco bag reminds me it's time to put out preemergent. |

|

|
I cut out the top of leftover oak plywood because I didn't want to spend any more on wood. The pocket holes are for the front face of the cabinet so it will secure flush with the frame. |

|
The bottom is leftover birch (I think) plywood, you can see the pocket holes securing to the front frame, the other sides are just screwed up fron the bottom. |

|

|
| Here is the cabinet with the saw and sides. I did a decent job of measuring because the sides of the cabinet are exactly flush with the cutting surface. The sides are 1/2" birch. |

|
| I don't know what this is a picture of, possibly the beautiful cherry tree in my front yard. |

|
| Creating rails and stiles on the router table. I'm not sure which this is. |

|

|
A finsihed set of rails. |

|
Assembling the raised panel doors. |

|
Routing some leftover birch plywood for the sides, front and back of the drawer. |
| This is how much poplar $30 will get you at Home Depot. |

|
| I routed up the bottom of the plywood drawer using my 1/2" ply bit. You could of course make these anywhere you wanted based on what you wanted to store in the drawer. I wanted at least one big section for saw blades. |

|
| This raised panel bit is scarey as hell. I practiced first on some leftover poplar. You can see why its so scarey. That huge blade spinning at 10000 rpms. |

|

|
The ungluded panel, rails and stiles, looks pretty decent. |

|
Fully glued panels. Incidentally I forgot to route the outside edges of the doors. |

|
Fitting together the drawer, using a pipe clamp as a weight. |
| Attaching the doors. |

|
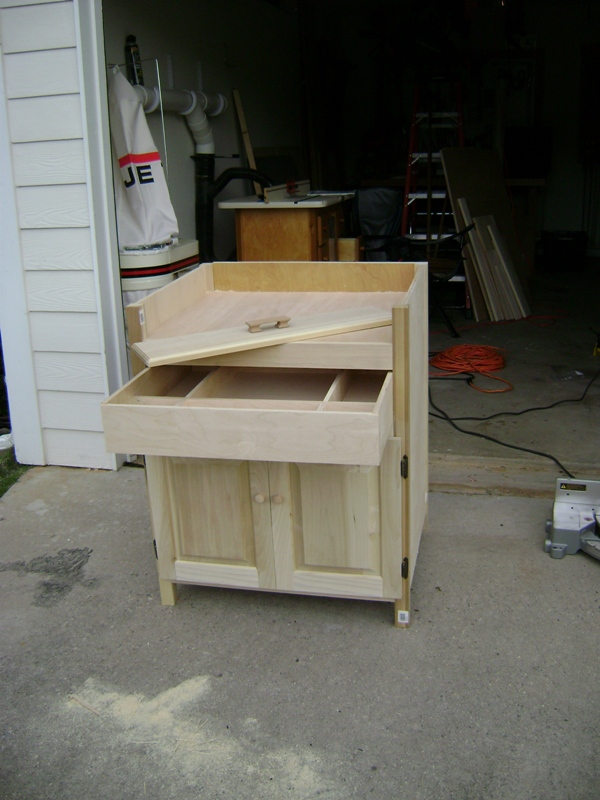
| The drawer is a bit of a tight fit, so I will use a center mount drawer slide, it's not attached yet in this picture. The front of the drawer has routed edges and I purchased the handle from Rockler. |
|
| I won't go into the issues that I had making this drawer, but it was a real pain. I had to take it apart twice; once because it was too wide and once because it was too deep. I tend to have to redo things quite often. |

|

|
I cut an opening in the back plywood to add a dust collection hood. I wanted a good way to attach it but wanted ot to be removable. I came up with this little bracket that slides into the rear of the cabinet and holds the dust collection hood firmly place. |

|
The drawer isn't crooked but the handle is a little. |

|
There is plenty of storage in the bottom, and I already have it filled up with those big plastic tool cases. I'm holding out on the "wings" because I really don't like the design of the wood ones. I'm going to try and find some rollers that I could mount to the bottom and would stretch out longways to the top. Still need to route more dust collection but it's done as far as I'm concerned! |